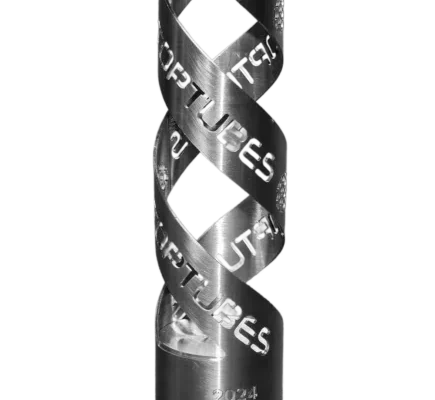
Designing for laser cutting is an essential part of any manufacturing or creative project that involves precise cutting and high-quality finishes. Whether you’re crafting intricate decorative pieces or engineering mechanical components, getting your design ready for laser processing requires attention to detail and a solid understanding of best practices.
Top Tubes prides itself on offering industry-leading laser-cut services and guides with a walk through on everything you need to know—from selecting the best file formats and choosing appropriate material thickness to understanding concepts like kerf and cutting lines. If you’re looking to make the process smoother and reduce turnaround time, the insights below will help you create a more production-ready laser cutting design.
What Are the Best File Formats for Laser Cutting?
The first and most crucial step in preparing a successful laser-cut design is selecting the appropriate file format. Laser cutters rely on vector data to guide the laser beam to cut material with high precision. Formats such as DXF, AI, EPS, and SVG are all commonly accepted and widely supported by most laser cutting machines. However, Top Tubes prefers to receive 3D models, with STEP files being the most efficient and streamlined format for their systems. Other accepted 3D file formats include IGS and XT.
While 2D files like DXF, SVG, and EPS can still be used, submitting them may increase lead times. That’s because the CAD team at Top Tubes will need to manually redraw your design in their system, after which they’ll send it back for your approval—extending the project timeline.
To summarise:
- Preferred formats: STEP (most preferred), IGS, XT
- Accepted formats: DXF, AI, EPS, SVG
- Raster images (e.g. PNG, JPG) are not suitable for cutting
- Submitting 3D models helps save time and ensures accuracy

Which Design Software Is Recommended?
Choosing the right design software will directly impact the quality and compatibility of your final output. At Top Tubes, the preferred platforms are SolidWorks and DraftSight. These programs allow for advanced 3D modelling and generate the most seamless workflows when preparing production-ready files.
While other programs like AutoCAD, Adobe Illustrator, CorelDRAW, Inkscape, Autodesk Fusion, and FreeCAD are still usable—particularly for 2D layouts—files from those systems may require additional conversion or rework if not properly formatted.
2D design software, such as Illustrator and Inkscape, is excellent for simpler projects like coasters, ornaments, or basic templates. However, for mechanical or structural pieces where material thickness, kerf, and interlocking joints are involved, it’s best to use CAD software capable of producing precise 3D models.
How to Choose the Right Material for Laser Cutting?
The material you choose is one of the most important decisions in the laser cutting process, impacting not only the strength and durability of your finished component but also the quality of the edge, cutting speed, and detail resolution. However, it’s essential to note that Top Tubes specialises exclusively in laser cutting tubular materials.
Top Tubes work with a wide range of metal tubes, including steel, stainless steel, and aluminium as standard. Other materials can be considered on request, depending on their suitability for laser processing. Whether you need components for structural frameworks, architectural applications, or custom fabrications, their tube laser cutting capabilities ensure precision and consistency across the board.
Tube Cutting Capabilities at Top Tubes

Top Tubes operates a suite of high-spec laser cutting machines, each with defined cutting tolerances. This ensures they can meet a wide variety of design requirements across different tube sizes and materials:
BLM LT7
- Round tube: Ø12mm – Ø152mm
- Square tube: Up to 152mm x 152mm
BLM LT7 (2)
- Round tube: Ø12mm – Ø152mm
- Square tube: Up to 152mm x 152mm
Trumpf 5000
- Round tube: Ø12mm – Ø152mm
- Square tube: Up to 120mm x 120mm
- Rectangle tube: Up to 152mm x 76mm
Trumpf 7000
- Round tube: Ø12mm – Ø254mm
- Square tube: Up to 180mm x 180mm
- Rectangle tube: Up to 220mm x 126mm
These systems allow Top Tubes to process a wide variety of tube profiles—including round, square, and rectangular—within consistent and reliable dimensional limits. By designing within these parameters, you’ll ensure that your parts are fully compatible with our machinery, avoiding delays or redesign requirements.

What Is the Ideal Material Thickness?
Another critical factor in designing for laser cutting is understanding how material thickness affects the cut quality, strength of the part, and potential for fine detail. While Top Tubes can accommodate various thicknesses within the limits of our cutting machinery and source material, most tube walls typically fall within a range of 1 mm to 10 mm.
Here’s how different thicknesses affect performance:
- Thicker materials (5–10 mm): These offer greater mechanical strength, ideal for structural and load-bearing applications
- Thinner materials (1–3 mm): Allow for more intricate geometry, cleaner edges, and faster cutting, but may not be suitable for heavy-duty use
- Very thin materials (<1 mm): They can be prone to distortion during cutting, especially if engraving is involved
When designing interlocking parts, tabs, or joints, it’s important that your design file accurately reflects the material thickness. This ensures the kerf is accounted for, fit is precise, and the part performs as intended once cut.
By aligning your material selection and design specifications with the capabilities of Top Tubes’ machinery, you’ll ensure a smoother production process, minimise waste, and deliver higher-quality results—every time.
What Is Kerf, and Why Does It Matter?
In laser cutting, kerf refers to the width of the material that’s removed by the concentrated beam during cutting. While it may seem negligible, kerf becomes incredibly important when pieces need to fit together precisely, especially in CNC-style projects.
For a snug, accurate fit:
- Add half the kerf value to internal elements (like tabs)
- Subtract half from external cutouts (like slots)
Accounting for kerf ensures your laser-cut parts will assemble smoothly, without gaps or force-fitting. The exact kerf value depends on your material thickness, laser cutter, and speed/power settings, so always check with your supplier if you’re unsure.

How Close Can Cutting Lines Be?
When creating detailed or compact designs, spacing between cutting lines is critical. Placing cuts too closely can lead to overheating, burnt edges, or even complete material failure.
To minimise these risks:
- Use wider spacing for thicker materials to prevent heat build-up
- It allows tighter spacing in thin materials but maintain airflow to avoid burning
- Always adjust based on geometry, kerf, and the material thickness
This is especially important when layering or nesting parts close together. Overlapping cuts should be avoided entirely as they can double the beam path and damage both the machine and your project.
Can I Include Fine Detail in My Laser Cutting Design?
You can absolutely include detailed elements in your laser-cutting design, but you’ll need to balance this with the limitations of the material and the machine’s capabilities. Intricate shapes and delicate elements are best suited to lighter, more flexible materials that can handle detailed geometry without burning or cracking.
Ideal applications for fine detail:
- Coasters, ornaments, and decorative templates
- Engraving monograms or logos
- Laser cutting patterns in thinner materials
Avoid using extremely fine features in load-bearing designs or with materials that are prone to warping. Always consider kerf and spacing when working with detailed cuts.
What Are the Best Assembly Techniques for Laser Cut Parts?
Creating components that fit together without fasteners or adhesives is one of the key strengths of laser cutting. To make assembly as smooth as possible, your design should incorporate proven techniques like slot design, nodes, and relief holes.
- Nodes: Small bumps on tabs or slots that provide friction and secure fits
- Radius corners: Replace sharp internal corners with rounded edges to reduce stress
- Relief holes: Placed at tight junctions to minimise cracking or breakage
A clean outline and accurate measurements of material thickness and kerf will go a long way toward ensuring your finished product is strong, easy to assemble, and visually consistent.
How Does Laser Engraving Work?
Engraving is the process of removing surface material to add detail, branding, or visual flair. In laser projects, this can be applied using a variety of methods depending on your intent.
There are three primary types of engraving:
- Line engraving: Produces outline-style marks with minimal depth
- Light surface engraving: Ideal for text, logos, or delicate shading
- Deep engraving: Adds strong tactile features or bold visual contrast
You can optimise the engraving process by assigning different colours to elements in your vector file. These colour codes tell the laser-cutting design software how to process each element, saving time and reducing setup errors.
How Should I Handle Text in Laser-Cut Designs?
To ensure text appears correctly on your final laser-cut part, you must convert all fonts to outlines or paths before exporting. The laser cutter cannot interpret editable fonts and will skip or misread them if not converted.
Best practices for handling text:
- Convert to outlines in SVG or DXF files
- Use stencil fonts or create bridges to retain centres of letters like “O” and “A”
- Always test small text on sample material before full production
By following these steps, you’ll avoid common problems and ensure your text cuts cleanly and accurately.
What Are Some Common File Preparation Mistakes?
Even the best designs for laser cutting can suffer from delays if the files are not prepared correctly. Fortunately, avoiding common mistakes is simple when you know what to look out for.
Before submitting your file:
- Remove all unnecessary annotations, borders, or notes
- Check the scaling (use mm for accuracy)
- Ensure all paths are closed and connected
- Eliminate duplicate or intersecting vector lines
- Merge shared edges to avoid double-cutting
- Export in a suitable format such as STEP, DXF, SVG, or AI
Double-checking these steps before uploading will help save time and reduce back-and-forth communication with the production team.
Conclusion
Properly designing for laser cutting involves more than just creating a good-looking file. By selecting the right file format, using suitable design software, accounting for kerf, and choosing appropriate material thickness, you’ll make the production process smoother and more efficient—not just for you but for your manufacturer.
Where possible, submit 3D files in STEP, IGS, or XT format, and design using SolidWorks or DraftSight for maximum compatibility with Top Tubes’ systems. This ensures faster turnaround, fewer revisions, and optimal output for your laser-cut project.
Whether you’re building a robust mechanical prototype or a delicate decorative piece, following these principles will help you achieve outstanding results.

